
Table of Contents
- Choosing the Right Base Outfit for Your Birthday Customization
- No-Sew Birthday Outfit Customization Methods That Take Under an Hour
- DIY Birthday Dress Tutorial: Cutting, Hemming and Adding Gathers
- Personalizing With Iron-On Transfers, Lettering and Birthday Numbers
- DIY Birthday Outfit Ideas for Adults and Birthday Outfits for Teenage Girls
- Materials, Budget and Care for Your Customized Birthday Outfit
- Booking Your Next Birthday Look From Swagg Boutique
- Frequently Asked Questions
Last Updated: November 11, 2026
Choosing the Right Base Outfit for Your Birthday Customization
A simple rule for DIY birthday outfit customization is to start with a base piece that already fits you well. A clean, well-fitting dress or jumpsuit is easier to change than a garment that pulls, gapes, or sits in the wrong place. Plenty of people skip this step and then spend hours fixing a problem the base outfit created.
Look for a base that suits your shape and the event. Choose simple silhouettes with smooth fabric so your changes stand out.
- Bodycon or fitted dresses: Great for gathers and cutouts, but check the seams first.
- Slip dresses: Easy to trim and hem, with a soft drape for trims.
- Jumpsuits: A strong choice for party looks, and they need no matching separates.
- Plain knit sets: Good for no-sew trims and stick-on details.
Before you cut or add anything, try the piece on with the shoes and undergarments you plan to wear. Check the fit at the bust, waist, and hips. Next, look at the length while standing and while sitting.
Watch out: Never cut into a base piece you cannot afford to lose. Test your method on a scrap of similar fabric first.
No-Sew Birthday Outfit Customization Methods That Take Under an Hour
Not every upgrade needs a sewing machine. No-sew methods can be a quick way to change a plain dress before a party.
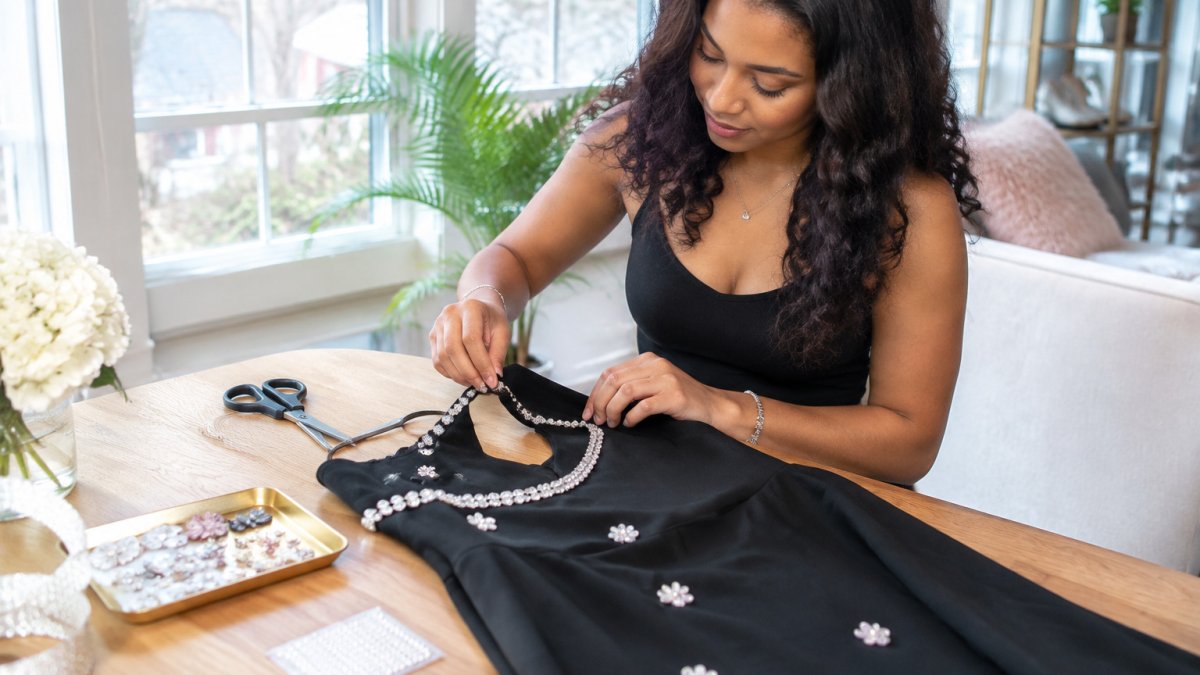
Start with a clean, dry outfit laid flat on a table. Smooth out wrinkles so trims and stickers sit evenly, and slide a piece of cardboard or parchment inside the garment so glue does not bleed through to the back.
Fabric glue trims (about 30-45 minutes plus cure time). Use a fabric-specific glue, and follow the bottle's curing instructions before washing. A common pattern is to glue lace along a neckline and ribbon along a hem, then weight the edges with books overnight so they dry flat.
Iron-on patches and appliqués (about 15-20 minutes). Place the patch, cover it with a pressing cloth, and press with a hot, dry iron for the time stated on the patch packaging.
Rhinestones and pearls (about 20-30 minutes). Check each stone with a gentle tug before wearing so loose stones are caught before the party.
Ribbon ties and sashes (about 10 minutes). Knot a satin or grosgrain ribbon at the waist, or thread it through a belt loop and tie at the side.
Fabric paint stencils (about 30-45 minutes plus dry time). Tape a stencil flat against the fabric, dab rather than brush with a stencil brush or sponge, and lift the stencil straight up. Follow the bottle instructions for drying and setting before washing.
Watch out: test every glue, paint, and patch on a scrap of similar fabric first.
DIY Birthday Dress Tutorial: Cutting, Hemming and Adding Gathers
If you want a more custom fit, a few basic sewing steps can change a plain dress into a birthday piece.
Step 1: Measure and mark. Lay the dress flat and mark your new hem length with chalk or a washable pen. Leave at least 1 inch of extra fabric for the hem.
Step 2: Cut the length. Cut along your marks with sharp fabric scissors. Keep the cut straight so the hem sits evenly.
Step 3: Hem the edge. Fold the raw edge under twice, pin it, and sew a straight stitch close to the fold. A narrow hem works best on lightweight fabric.
Step 4: Add gathers. Sew two rows of long basting stitches across the area you want to gather. Pull the thread gently to create soft ruching, then secure the ends.
Plan on a few hours for this project, including time to test fit.
Personalizing With Iron-On Transfers, Lettering and Birthday Numbers
Personal details make a birthday outfit feel special. Iron-on transfers, custom lettering, and age numbers are easy ways to add a message without a full redesign.
For iron-on transfers, print a design on transfer paper using a home printer. Mirror the image first if the text needs to read correctly. Cut around the design, place it face down on the fabric, and press with a hot iron following the transfer paper instructions.
For lettering, try:
- Fabric markers: Write a name or phrase on the bodice or sleeve.
- Iron-on letter sheets: Spell out a short message across the chest or back.
- Puffy paint: Outline numbers for a raised, textured finish.
For birthday numbers, choose a font that is easy to read from across a room. Place the number where it will be seen in photos, such as the upper chest or hip.
Test every transfer on a scrap first. Some transfers crack after the first wash, so plan to hand wash the piece.
DIY Birthday Outfit Ideas for Adults and Birthday Outfits for Teenage Girls
Adult birthday looks often lean glamorous, while teen styles usually focus on playful details. Many people find that a few small changes can shift a basic piece from casual to celebration-ready.
For adults, consider a sleek evening dress with a single statement accent. A sequin trim along the neckline or a bold belt can carry a whole look.
For teenage girls, try bright colors, fringe, and playful lettering. A simple skirt set with a custom name patch or a stick-on star pattern feels fresh and fun. Keep fabrics comfortable for dancing and long hours.
Ideas for Teenage Girls
- Fringe hem: Glue fringe along the hem of a plain skirt.
- Name patch: Add an iron-on name label to a top.
- Star accents: Stick on metallic stars across a dress for a party look.
- Tie-dye sleeves: Dip the sleeves in fabric dye for a bold effect.
Materials, Budget and Care for Your Customized Birthday Outfit
A customized outfit can be budget-friendly, but costs add up fast if you buy the wrong supplies. The table below gives approximate retail ranges for a single small project; prices vary by store and brand, so treat these as planning figures rather than quotes.
| Supply | Approximate cost | Notes |
|---|---|---|
| Fabric glue (1-2 oz) | $5-$9 | One bottle covers several small trims |
| Iron-on transfer paper (5-10 sheets) | $8-$15 | Buy the pack sized for light or dark fabric |
| Iron-on letters or numbers | $4-$10 | Reusable if you keep the backing |
| Flat-back rhinestones (pack) | $4-$8 | Check backing type before buying |
| Satin or grosgrain ribbon (3-5 yards) | $3-$7 | Grosgrain holds a knot better than satin |
| Fabric paint and stencil | $6-$12 | One small bottle goes a long way |
| Basic sewing kit (if sewing) | $10-$20 | Needles, thread, pins, and scissors |
| Seam ripper | $3-$6 | The cheapest insurance against a bad cut |
Approximate cost
Fabric glue (1-2 oz) $5-$9
Iron-on transfer paper (5-10 sheets) $8-$15
Iron-on letters or numbers $4-$10
Flat-back rhinestones (pack) $4-$8
Satin or grosgrain ribbon (3-5 yards) $3-$7
Fabric paint and stencil $6-$12
Basic sewing kit (if sewing) $10-$20
Seam ripper $3-$6
Costs depend on which supplies you already own. Borrowing or sharing a sewing machine is worth considering before buying one for a single outfit.
Tool alternatives that work. A pressing cloth can be a clean cotton pillowcase. Parchment paper substitutes for transfer backing in a pinch. A hair straightener on low heat can press small patches, though a real iron gives more even results. Skip hot glue guns, which leave hard lumps that crack in the wash.
Making the design last. Turn the garment inside out before washing, use cold water on a gentle cycle, and skip the dryer for anything glued, painted, or ironed on. Air-dry flat. For hand washing, use a mild detergent and avoid wringing the decorated area. Following care labels helps decorated garments last longer.
Comfort and safety. Choose skin-friendly trims and keep scratchy appliqués off the inner arm and neckline. For young children, skip small rhinestones and loose beads that can come off, and check every attachment with a firm tug before the party. Avoid tight elastic or heavy trim on a dress a child will sit and run in for hours.
If you want to finish the look with a little extra polish, our Swagg Lashes premium lash set ($10.99) and Lingerie Tape ($7.50) are easy additions to your outfit.
Booking Your Next Birthday Look From Swagg Boutique
Customizing your own outfit is a great way to stand out, but sometimes a ready-made piece is the faster route. At Swagg Bootique LLC, we carry trendy dresses, sets, and jumpsuits built for nights out and birthday celebrations. New drops arrive weekly, and we offer fast shipping.
Join our VIP list for 10% off your first order, plus early access to new drops and members-only offers.
BUTTON: GET MY 10% OFF CARD_TITLE: Want a birthday look that's ready to wear? CARD_TEXT: Swagg Bootique LLC offers trendy dresses, sets, and jumpsuits with weekly new drops and fast shipping.
Frequently Asked Questions
How can I customize a birthday outfit at home?
Start with a simple base piece, then add one or two personal touches such as iron-on lettering, fabric trim, or a birthday number appliqué. Keep the design to a few focal points so the outfit reads as intentional. Test any transfer or adhesive on a hidden seam first, and let it cure fully before wearing. Most home customizations take one to three hours, depending on whether you sew.
How do I make a DIY birthday outfit without sewing?
No-sew methods rely on iron-on transfers, fabric glue, adhesive trim, and fabric tape. Choose a heat-resistant base fabric, apply the design following the product's temperature and timing instructions, and press firmly. Adhesive pasties and lingerie tape from Swagg Boutique are also available as adhesive options for securing fabric.
What can I add to a plain dress to make it look special for my birthday?
Consider adding a contrasting belt, a sequin or rhinestone trim along the neckline, a ruffled hem band, or a custom name or age design placed near the waist. Lace appliqués and fringe also work well on solid dresses. Pick one bold element rather than many small ones so the look stays polished. Always check that added weight will not pull the fabric out of shape.
What materials do I need to decorate a birthday outfit?
A basic kit includes fabric scissors, a heat-resistant iron, iron-on transfer paper or vinyl, fabric glue, pins, and a measuring tape. Sewing projects also need thread and a needle. Buy supplies in quantities matched to your project so nothing goes to waste. Check each product's care label before pressing or gluing.

